If you’ve come here seeking assistance with a specific issue related to your Krups coffee pod machine, please navigate to the troubleshooting guide that matches your specific type of coffee maker:
But if you need help with problems with your Krups superautomatic coffee maker, read on:
Dealing with dirt in Krups machines
Let me begin by informing you that in this guide, I will show you how to repair and maintain your Krups superautomatic coffee maker by YOURSELF.
One of the vulnerabilities of Krups superautomatic machines is related to cleanliness. Despite their precision engineering, coffee residue can gradually lead to malfunctions. Therefore, it is crucial to perform periodic cleaning and descaling to ensure the optimal performance of these coffee makers.
➡️ Check out this article about cleaning and descaling Krups superautomatic coffee machines.

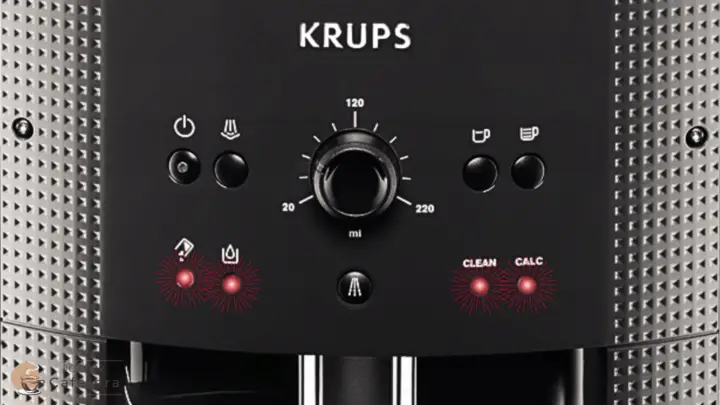
Problem with the “clean” light of a Krups coffee maker
When the “clean” light of a Krups super-automatic coffee maker starts to flash, it is synonymous with needing a cleaning cycle. The problem arises when, after cleaning, the button continues to flash.
The first thing to do is to perform another cleaning following the instruction manual of your coffee maker to the letter. If you dislike reading or cannot understand the steps well, visit my article on cleaning and descaling a Krups super automatic.
Fortunately, Krups coffee makers allow us to continue using the coffee maker even though this annoying light is always flashing. Most likely, the coffee maker has been unable to store the last cleaning in its memory, so it is requesting it. Be sure to run a new cleaning cycle, and do not interrupt the process at any time.
⚠️ Note: If the cleaning light keeps flashing even after you’ve run multiple cleaning cycles, it could indicate a problem with one of the sensors (such as the water tank, drip tray, or coffee grounds drawer) or, in the worst-case scenario, a malfunction in the control board. You can try to reset the machine or purchase a new control board.
The Krups coffee maker leaks water
As I said in the introduction to this article, Krups manufactures coffee makers for Nespresso and Dolce Gusto but also has a line of super-automatic coffee makers. Therefore, in this section, we will deal with the water loss of the super-automatic machines.
Water leakage through the brewing unit piston
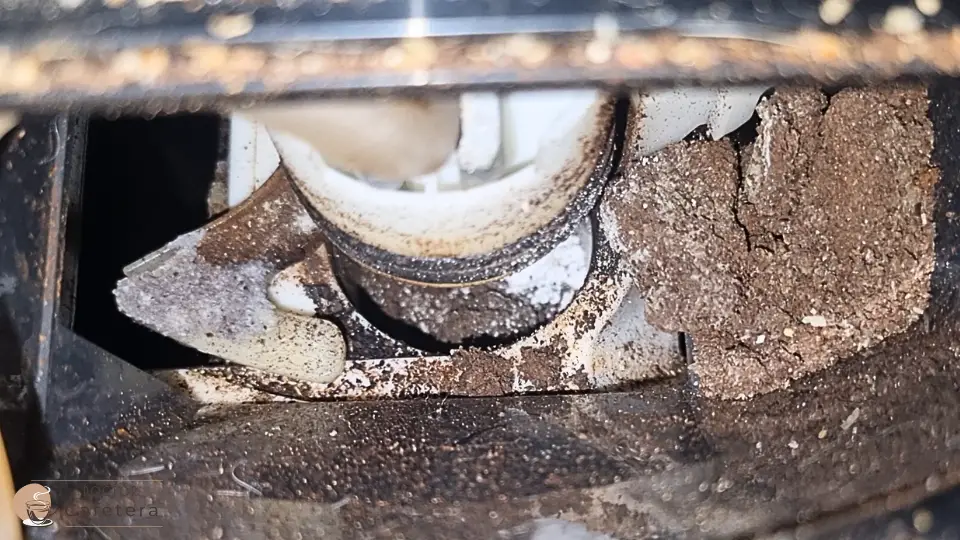
The most common place where a Krups super-automatic coffee machine loses water is through the piston of the brew unit since this is a moving part continuously surrounded by coffee and water at high temperatures.
In the following image, you can see where it is located in a Krups EA model. To get to it, you will disassemble only the upper part of the housing of the coffee maker, for which you will need a Torx 15 screwdriver.
Once you access the piston, you have two options: disassemble it and clean it well, or replace it with a new one that will cost you only $17.
The following image shows how the piston is disassembled, and each part is cleaned and reassembled as it was. Pay special attention to the black rubber valve (red square):
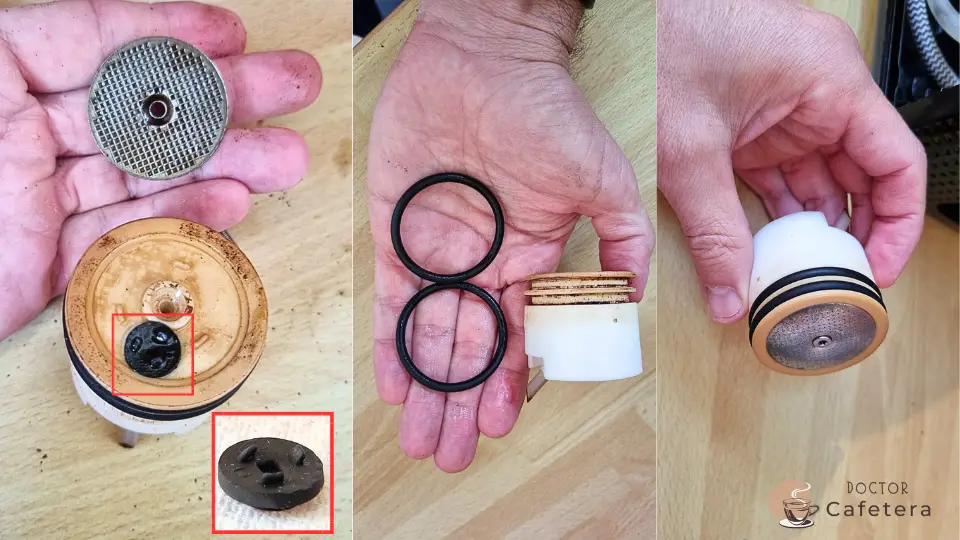
If water escapes through the piston, it is either because the O-rings are not sealing properly and, therefore, you should buy new ones (see the purchase link) or because the black rubber valve is clogged and causes the pressure to increase too much in the coffee brewing chamber.

Water loss through the flow meter or pipes
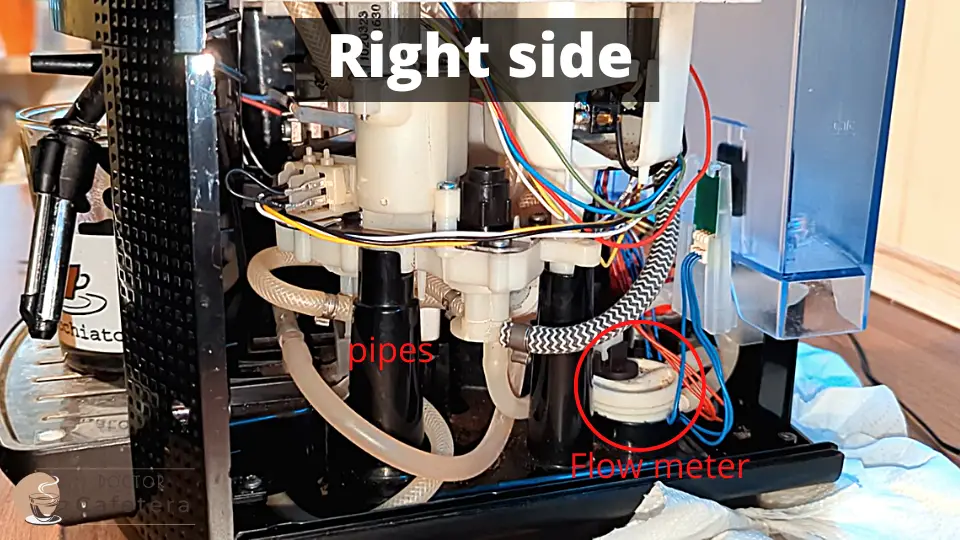
The second most common point through which a Krups can lose water is via the pipes that circulate water inside the machine or through the flow meter.
All these components are subjected to significant stress due to the continuous circulation of water, combined with the vibrations generated by the coffee maker during the grinding and coffee preparation process. The pipes can often become loose, or the flow meter may open.
To identify the problem, you should disassemble the right side of your coffee maker and observe where the water is dripping:
Water leakage from the thermoblock or pump
Two of the most important elements of the Krups could be damaged: the thermoblock and the pump. Both elements are in continuous contact with water and, therefore, susceptible to leakage.
The thermoblock can sometimes crack so that we would see clean, hot water dripping from the base of the coffee maker. If the water pump has a damaged internal O-ring, we would see water in the base of the coffee maker, but this would be cold.

You must almost disassemble your Krups to locate this leak. Once the casings are removed, prepare a coffee and see if the culprits are the pump or the water heater. If these components are the reason, it is best to replace them.
Note: I have received several Krups in the workshop with a broken rubber gasket inside the thermoblock that seals the piston shaft’s movement. If this is the case, you will see coffee at the bottom of the coffee maker. If you need help with this, drop a comment below.
The Krups doesn’t brew coffee (or It’s too cold or too hot)
Continuing with the previous issue related to the thermoblock, we encountered this problem related to the thermostat.
The thermostat is responsible for regulating the water temperature used for brewing coffee. If it develops a fault, it can cause your Krups to fail to produce coffee.
If you have a Krups with a display, you may likely see a plug icon illuminated, indicating that you should unplug it. This is because most coffee makers, regardless of their type, manufacturer, or model, are designed to prevent the user from brewing coffee if the thermostat malfunctions.
These are the technical specifications of the thermostat:
- Coffee: 108°C (position 1), 111°C (position 2), 113.5°C (position 3)
- Steam: 150-140°C
- Safety cut-off: 190°C
Note: If you want to check if your thermostat is faulty or has a poor connection, you should obtain an exact resistance (at 25°C) equal to 100Kohm +/-5%.
Unlike other brands, the thermostat in Krups machines is integrated into the thermoblock as an inseparable unit. If it were to fail, you would need to perform the repair directly on-site or replace the entire assembly (thermoblock + thermostat).
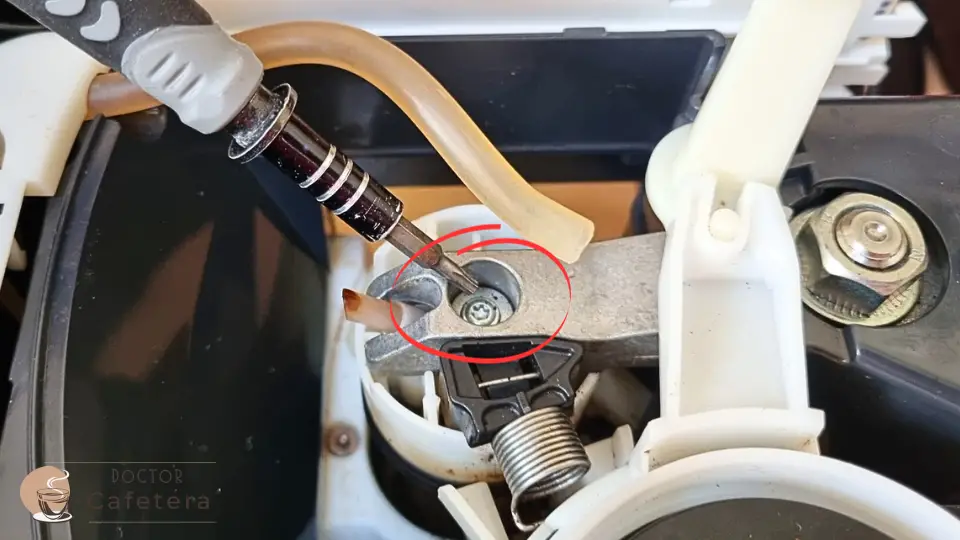
Where is the thermostat located in Krups, and what does it look like?
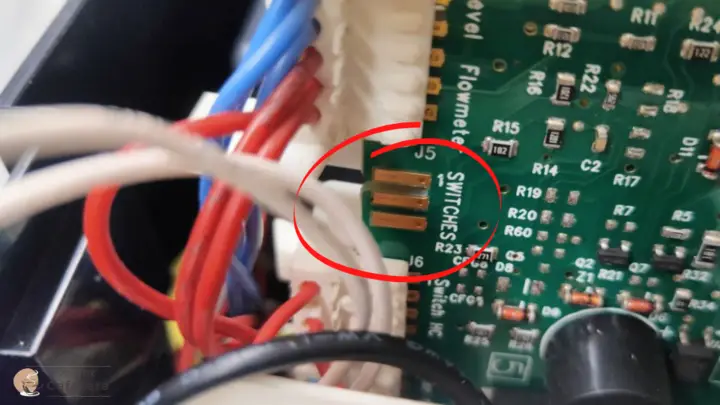
What you can see of the thermostat in Krups super-automatic machines are the terminals where the wires connect to the control board:
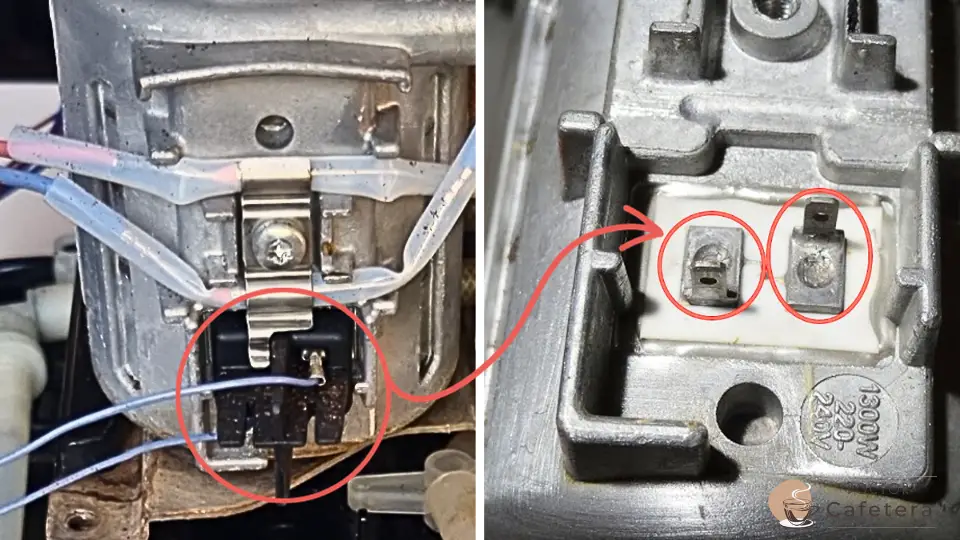
The entire white area under the terminals in the image on the right is the thermostat; as you can see, it cannot be replaced. Only in cases where the terminals have become unsoldered do you have an opportunity to fix your coffee maker.
Krups super-automatic, all Lights flashing
When all the lights on your Krups coffee maker seem to turn on for no apparent reason, it’s important to ensure that your assessment is accurate. In other words, you must interpret the meaning of their pattern when lighting up.
➡️ I have created a comprehensive article to assist you with this. Click here to view it.
How to reset a Krups super-automatic. Lights won’t stop flashing
If you have reached the point of wanting (or needing) to reset your Krups bean-to-cup machine, it’s because your coffee maker is not working or is performing poorly. Although this is a very extreme case, it has a solution, and I will explain how to resolve the issue.
Note: Performing a reset on your Krups coffee maker essentially restores the machine to its factory default settings, erasing all stored data and any custom settings you may have previously programmed.
Distinguishing a malfunction from a breakdown
Before resetting your Krups, you should consider the possibility of the machine not functioning properly for some easily solvable reason.
What is a breakdown in a Krups coffee maker?
The lights on the Krups indicate things like the need for cleaning, descaling, adding water, etc. Most of these lights will remain on unless we complete the coffee maker’s request, but there will be cases where they continue to be on despite having done so.
In these cases, it’s important to check if the machine’s components are correctly positioned and its sensors function correctly. Without this, a reset will not solve the problem.
For example, if your Krups asks you to insert the coffee grounds drawer, and even though it’s inside, the coffee maker still requests it, the detection sensor may be damaged, or the drawer may not activate. The same applies to the water tank magnet, the flow meter, etc. Therefore, before resetting, you must ensure your coffee maker is clean, and the sensors are working correctly.
What is a malfunction in a Krups coffee maker?
When we talk about the malfunction, the Krups coffee maker usually indicates an “operational failure” by causing all the lights to flash simultaneously or by signaling the immediate shutdown of the coffee maker.
These cases occur when user safety or the integrity of the coffee maker is at risk. Most cases are related to the thermoblock and thermostat; if the temperature becomes too high or the sensor cannot read it, the coffee maker will automatically shut off for safety.
Therefore, if your coffee maker suddenly turns off or all the lights come on simultaneously, you don’t need to restart the machine but replace the thermoblock or thermostat.
Resetting Krups EA81 coffee maker
As mentioned, entering the service menu can render your Krups coffee maker inoperable. No operations are possible; the machine does not heat up or make sound. The 4 LEDs keep flashing. It is important to emphasize that attempting such actions is done at your own risk and responsibility.
Step-by-step guide to resetting Krups EA81:
- Disconnect the Krups coffee maker from the power supply (unplug it).
- Remove the water tank, the coffee grounds container, and the slide above the container (if your model has one).
- Turn the coffee volume control to 20 ml.
- Press and hold the “strong coffee” button on the far right and plug in the machine.
- Now, all LEDs will light up. Place the water tank, the coffee grounds container, and the cleaning slide (if any).
- Gradually turn the coffee volume control until all LEDs go off (approximately in the middle position).
- Place a container of at least 600ml under the coffee outlet and steam nozzle, and press the “weak coffee” button.
- Now, water will start coming out of the coffee and steam nozzles, and the piston will move to the top edge of the infusion chamber. The process repeats twice. Then, all red LEDs turn off.
- Press the “weak coffee” button again.
- The machine lowers the infusion piston twice, remaining in its lowest position after the two lowers. If “all LEDs are flashing,” unplug the machine and wait at least 5 seconds.
- Plug the coffee maker back into the power supply; the infusion piston will move to its initial position.
- Place the container under the coffee outlet and steam nozzle.
- Fill the water tank.
- Press the “strong coffee” button.
- Now, a program will run to fill the coffee maker’s system.
- After this, the coffee maker should work without issues.
What to do If a reset doesn’t fix the Krups
There are times when the reset doesn’t work on some coffee makers, and this is due to a damaged control board. If, after cleaning everything thoroughly and checking all the sensors, the coffee maker still doesn’t work, you will need to replace the control board.
Like any electronic device, Krups coffee makers are not immune to electrical/electronic failures, and when that happens, there is no other solution than to replace the control board. This should cost you no more than $25 and will fix your coffee maker.
Issues with the grinder in a Krups
Regularly cleaning the grinder is essential, especially if you use oily coffee beans. Over time, oils and coffee grounds can accumulate on the burrs, creating a layer that hinders the grinder’s performance.
In theory, adjusting the grind level using the knob inside the hopper should be the only interaction needed for users of Krups super-automatic coffee makers. This allows you to customize the grind thickness according to different coffee beans and beverage preferences.
However, some users encounter an issue where the grinding process takes too long, resulting in a less optimal coffee experience. Ideally, the grinder should complete the task in 6 to 8 seconds for the best results.
How to calibrate the grinder in a Krups
A question that arises for many users of Krups super-automatic coffee machines is how to calibrate the coffee grinder to grind faster. While the correct time is between 6 and 8 seconds, some coffee makers take between 9 and 11 seconds, resulting in too much ground coffee in the puck, and the extraction is not performed correctly.
If your coffee maker is under warranty, the best thing you can do is call customer service and have them calibrate it for you. But if the warranty has expired, I will explain what you can do to solve this problem.
Note: Accessing the service menu can lead to more serious problems, so if you do so, it will be at your own risk.
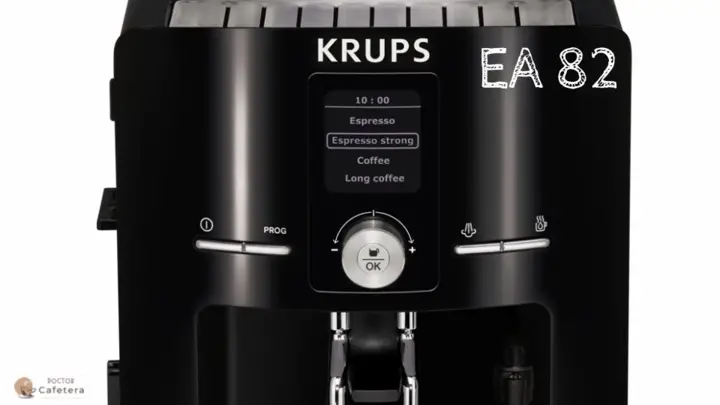
How to calibrate the grinder of Krups with the “prog” button
Programming or calibrating the grinding time of this type of coffee maker is relatively simple, thanks to the “prog” button that will take us directly to the desired menu if we follow the steps described below.
Step-by-step guide for calibrating Krups coffee grinders with the “prog” button:
- Unplug the coffee maker from the power supply.
- Remove the water tank, the coffee grounds container, and the tray above the coffee grounds container.
- Press the “prog” button while plugging the coffee maker into the power supply.
- A menu for selecting the grinding time will appear on the screen.
- Turn the central button and choose the desired time.
- Once you select the type you prefer, press OK on the central button.
- Unplug the coffee maker.
- Place the water tank and the tray above the coffee grounds container and the coffee grounds container itself.
- Plug in the coffee maker, and everything will be ready.
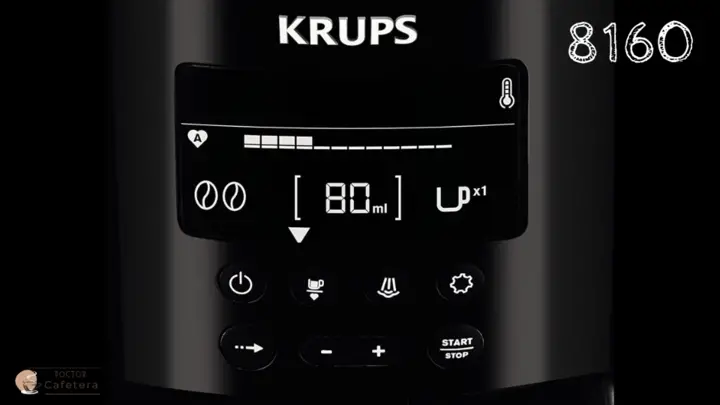
How to calibrate the grinder in the Krups 8160
This issue often arises after a grinder blockage, most commonly caused by incorrect coffee beans or lack of cleaning of the Krups machine. Never use coffee beans that are not naturally roasted, without sugar or other additives.
Step-by-step guide for calibrating the grinder in Krups 8160:
- Unplug the coffee maker from the power supply.
- Remove the water tank, the coffee grounds container, and the tray above the coffee grounds container.
- Press the arrow button while plugging the coffee maker back into the power supply.
- Press the START button once, and brackets [ ] will appear on the right side.
- Press the START button once, and three zeros will appear inside the brackets [000] on the left side.
- Place both the water tank and the tray above the coffee grounds container, and the coffee grounds container itself.
- Now press the START button.
- P2 appears.
- Press the steam button once to start the diagnosis.
- Water starts flowing through the steam nozzle.
- Press the steam button once.
- The piston lowers, but not to the bottom (twice).
- The piston lowers to the bottom, water flows through the piston, and the disc is ejected.
- P4 appears.
- Unplug the coffee maker from the power supply.
- Reconnect to the power supply, turn on the coffee maker, and it will be calibrated.
Note: If your coffee maker does not have a tray above the coffee grounds container but the software is updated to that of coffee makers with a tray, it will not work because you will not be able to complete the step of placing the tray on top of the coffee grounds container or the necessary micro switch.
How to calibrate the Krups EA81 series
Before you begin, note that the Krups EA81 coffee maker has only three grind settings, making it less flexible than other Krups models. These instructions will guide you through calibrating the grinder and addressing common issues such as grinding difficulties, jams, or coffee residue on the burrs.
Basic grinder calibration:
- Disassemble the top part of the coffee maker without removing the front or back parts.
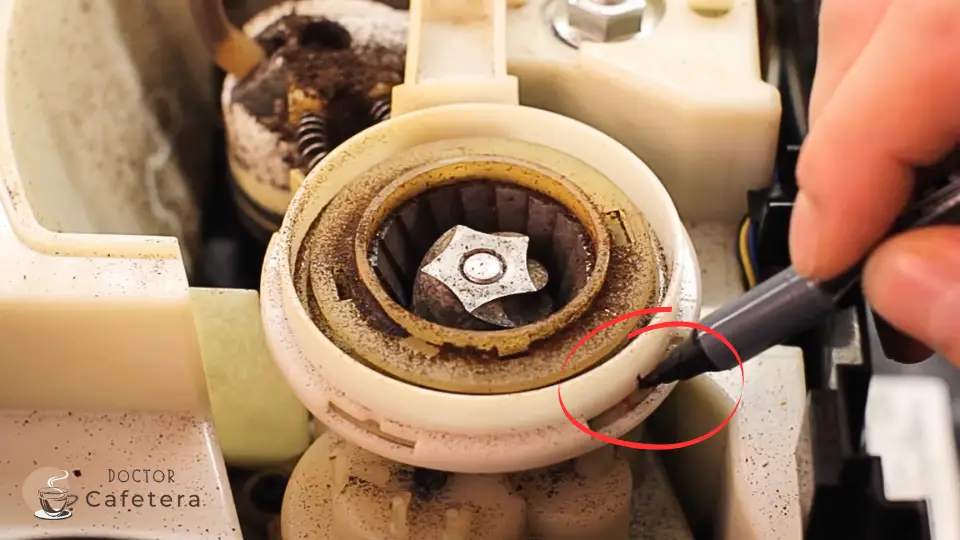
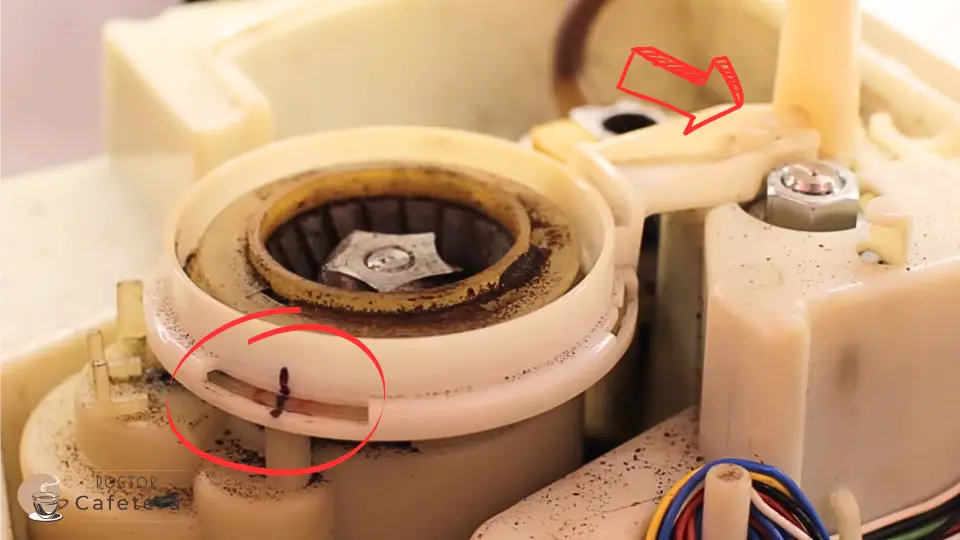
- Rotate the grinder until you see a mark through an opening in the plastic guard that aligns with the internal arc of the grinder. Remember, there are only three rotation positions if the selector is still connected.
- Visibly mark this position with a marker. Draw a line connecting the outer guard with the inner arc:
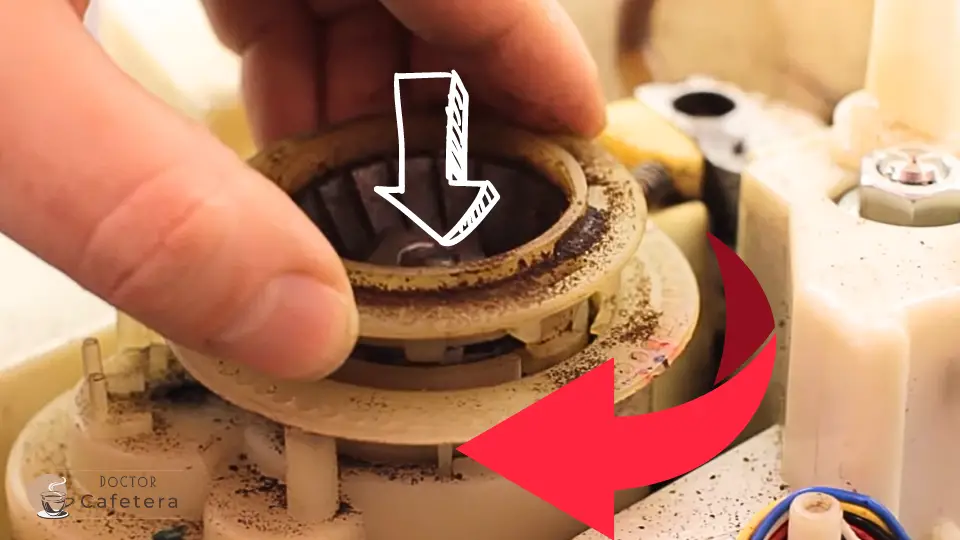
- Remove the plastic guard by taking advantage of the two openings around its perimeter.
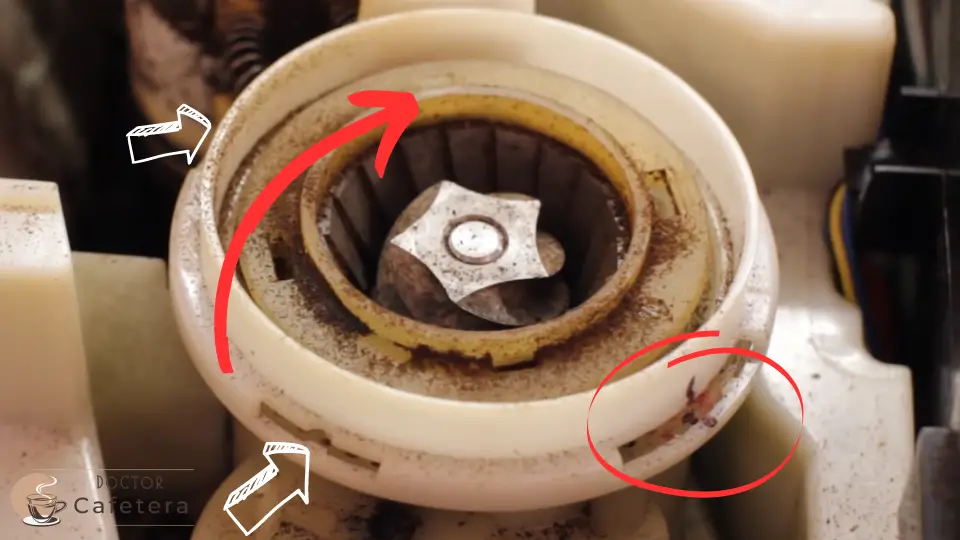
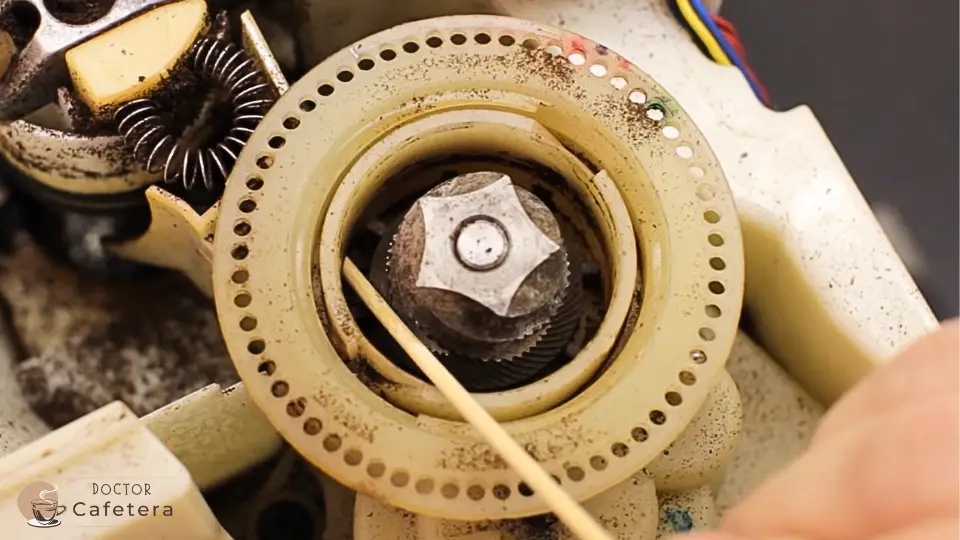
- Rotate the internal arc of the grinder counterclockwise until it reaches the end of its travel. This will allow you to remove the outer burr.
- Extract the outer burr by pulling upward.
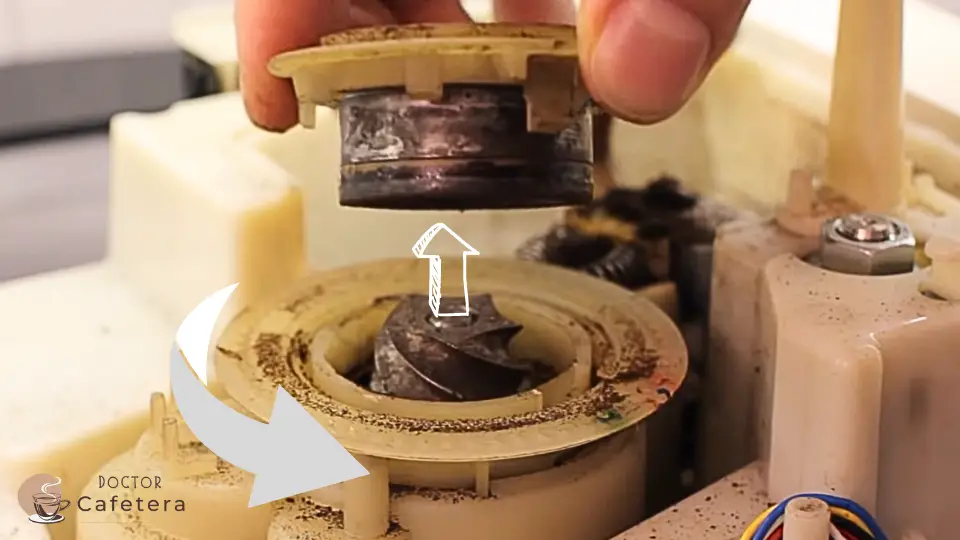
- Clean the inside of the grinder thoroughly with a brush or a thin wooden stick to remove any coffee residue.
- Reinstall the outer burr and press it down.
- Rotate the internal arc clockwise to secure the outer burr.
When you reinstall the outer guard, make sure that the lines you drew match to maintain the original grinding setting.
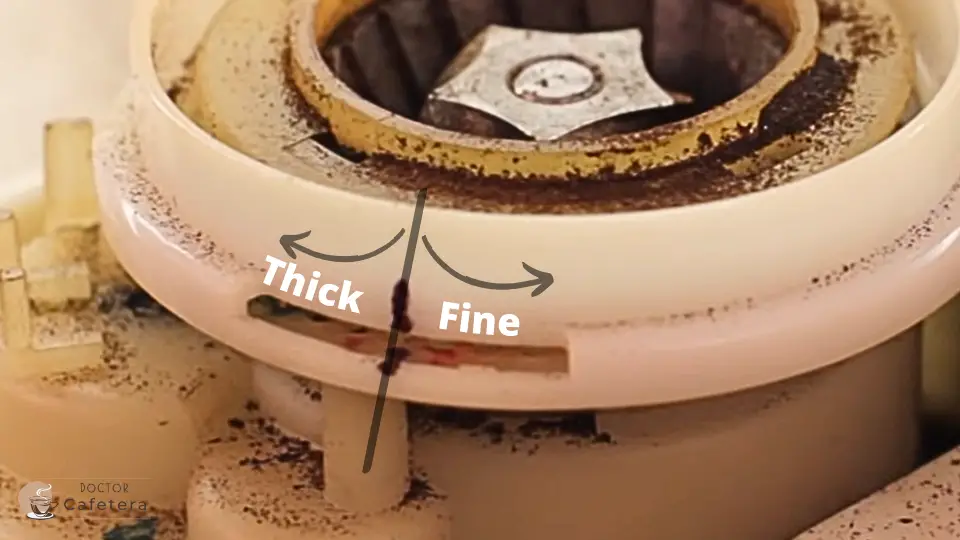
Adjusting the grinding level:
If you wish to modify the fineness or coarseness of the grind:
- Rotate the internal arc one or two notches clockwise in relation to the outer guard (misalignment) to make it finer.
- Rotate the internal arc counterclockwise in relation to the outer guard (misalignment) to make it coarser.
Following these steps, you will have calibrated your grinder to achieve the desired grind size. Ensure the plastic guard is in place, and the lines match if you wish to maintain the original setting. Now, you can enjoy perfectly ground coffee according to your preferences.
Useful information on Krups coffee maker failures
If your Krups coffee machine is new and has been less than 30 days since you purchased it, you can contact the seller and request an exchange or a refund. In this case, you will need to provide the purchase receipt.
If more than 30 days have passed, but your Krups coffee maker is less than two years old, you can still file a claim with the manufacturer under the warranty terms and conditions (which may vary for the United States).
Here are the primary contact details for Krups worldwide:
Krups US
Krups Canada
Krups around the World
Krups local consumer service centers:
If your Krups coffee maker is no longer under warranty and you are not comfortable fixing it yourself, you can find the contact details for your local consumer service center below: