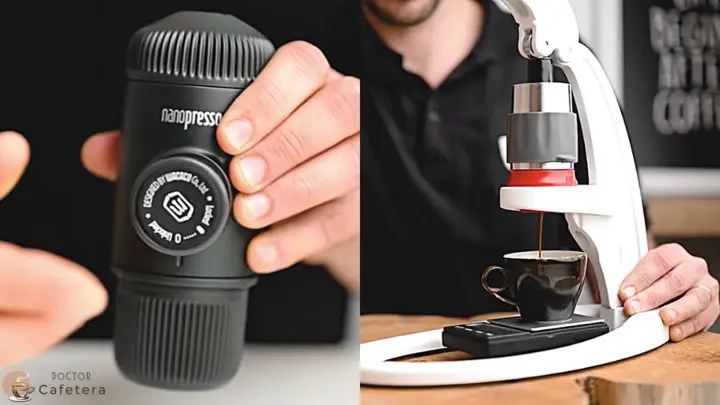
Today I will tell you about my experience with the Wacaco Nanopresso, a small portable espresso machine. This coffee maker is so small that it comes in a case not much bigger than a pair of sunglasses.
Components of the Nanopresso machine
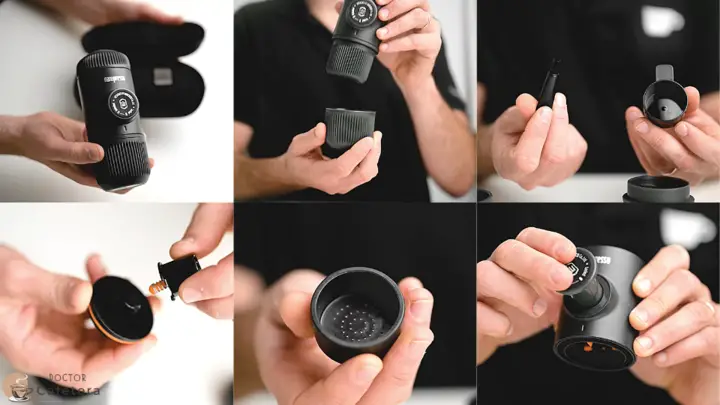
Well, let’s start with a quick unboxing: This coffee maker comes in a small box where we find:
- The Nanopresso inside its case is of very good quality.
- The warranty and a small instruction manual.
- Underneath, we take out a small cup.
- If we unscrew the water tank (capacity of about 80 milliliters), we find inside a small brush for cleaning and a spoon that also serves as a tamper.
- On the other hand, we unscrew the filter part and the nozzle. This nozzle is disassembled under pressure and has an outlet block that is equivalent to other machines’ pressurized filter.
- Inside the body, we see a basket where we place the coffee, which has a capacity of approximately 8 grams.
- In the body of the coffee maker, we unblock the piston that pumps the water.
I admit that I was very surprised to hold it in my hand. Seeing it through videos and photos, knowing that it is all made of plastic, I didn’t have many expectations regarding construction. However, it feels quite sturdy and heavy, and you can tell it is well made and looks quite resistant.
The Nanopresso weighs about 330 grams and is about 15 centimeters tall.
How to use the Nanopresso coffee maker step by step
1. The first thing we have to do is to heat the water. As always, the temperature will depend on the coffee you use. With this machine, I always recommend a medium/high roast coffee, which is easier to handle.
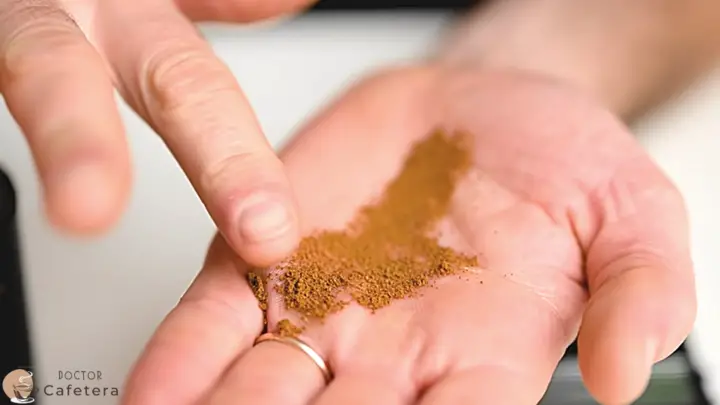
2. To begin, we will grind the coffee a little bit coarser than we normally use for espresso machines due to the pressurized filter. Then we have to keep testing until we find the ideal grind.
3. Before preparing the coffee, we have to preheat everything. This step is very important since, during the journey and the contact with the different parts of the machine, the water loses a lot of temperatures even though it is made of plastic.
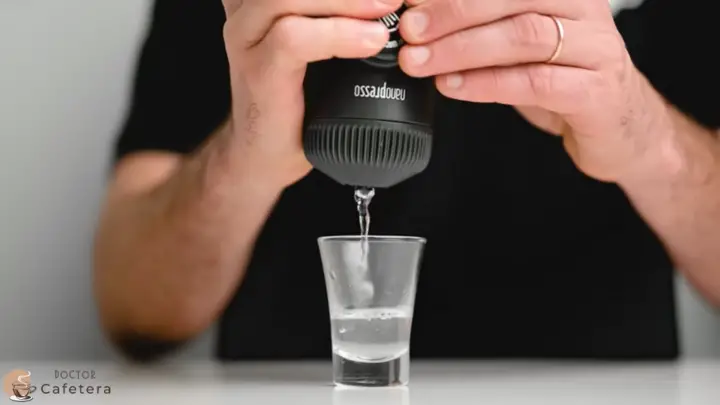
4. Once we boil the water, we will place it in the tank up to the line indicating the maximum; if we go over this line, it will pour when we screw it in, and when we use our hands, we could burn ourselves.
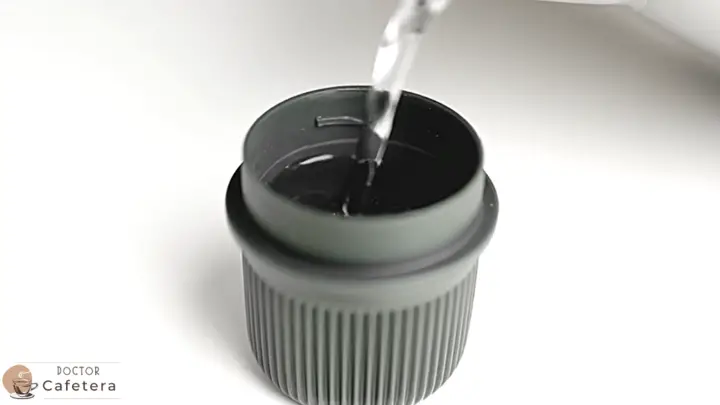
5. Now, we screw it into the body and pass the water into the cup we will use, heating all the parts, including the cup, to maintain the temperature.
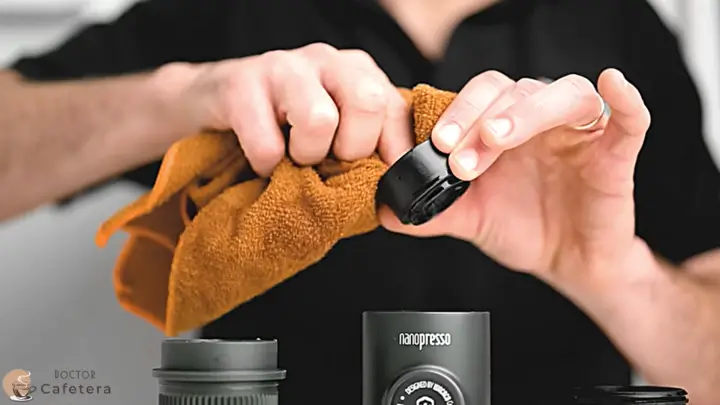
6. Once we pass all the water, we open the parts and make sure to dry well the part where the coffee will be since even a few drops in the ground beans will cause channeling.
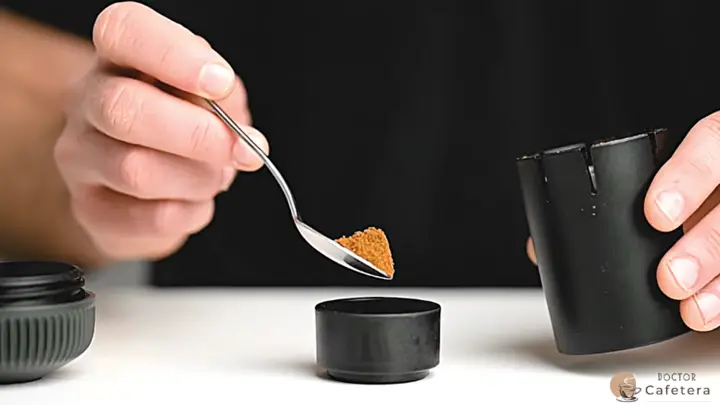
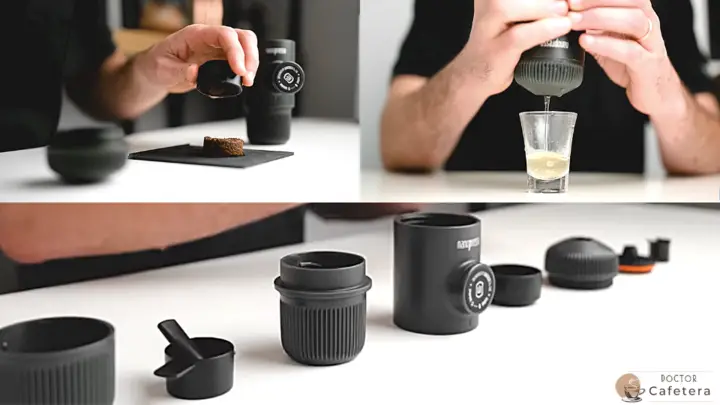
7. We add the ground coffee to the basket, although this is the frustrating part since it does not come with any funnel that facilitates placing the coffee in this small basket.
Supposedly the spoon that comes with it is used to place the ground coffee in the basket, but it does not fit in most grinders, nor does it fit the 8 grams of coffee in it. For this reason, I find this tool useless, and I prefer to use a normal spoon.
I add the coffee with my spoon and rotate the basket to place it uniformly. Once we have placed the 8 grams, we tap it dry and compact it with the back of the measuring spoon that comes with the coffee maker.
8. Now, put the basket on the upper part of the body and screw the filter with the nozzle.
9. Add the boiled water to the tank again, screw it to the body, and unlock the piston so we are ready for the extraction.

10. We start pumping. The recommended flow is one pulse per second; if we press faster, we will produce too much pressure, and the coffee may block or come out too strong.
In about 8 pulses, the basket fills with water; I like to slow down and let it pre-infuse for 5 to 10 seconds after this amount.
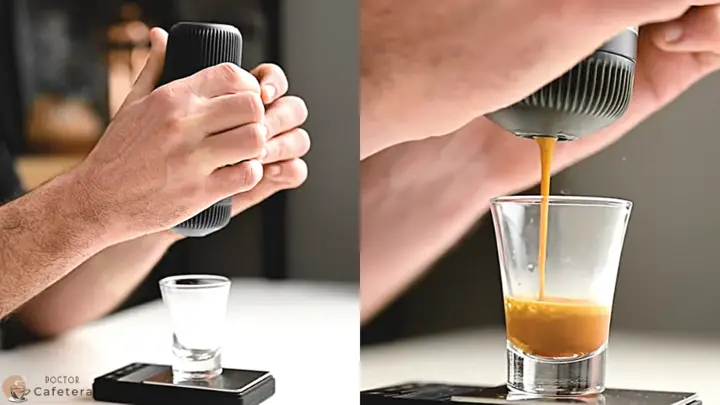
11. After this, we continue pressing until the desired amount of espresso is reached.
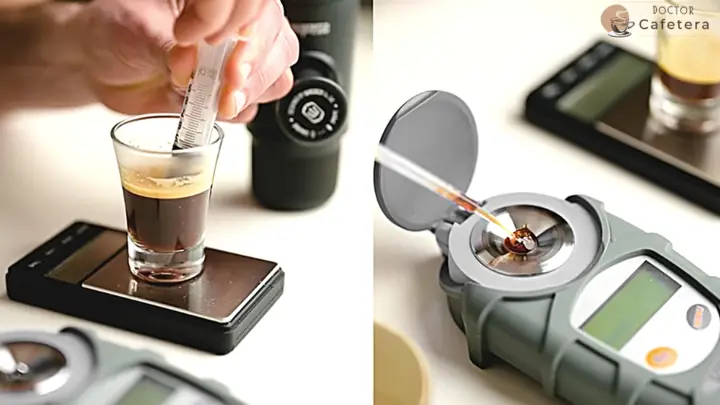
Because we have to grind a little coarser than normal, we have to aim for a slightly longer espresso, with a ratio of 1.2.5 or 1.3, to obtain a good extraction. I checked this by measuring it with the refractometer.
Using a light roast coffee, you should press up to 24 grams, and when you taste it, you will find it very tasty, obviously using a good coffee.
Cleaning of the Nanopresso maker
The cleaning of this coffee maker is quite simple. It is necessary to disassemble all the parts and run them under hot water immediately after use. We clean the filter screws that can accumulate a little coffee with the little brush.
I recommend loading the tank with hot water and passing it through the machine again to clean it well, especially the nozzle.
From time to time, unscrew the filter, unscrew the nozzle and give each part a good rinse for a more thorough cleaning. After drying all the parts, we are ready to use or store it again.
Where to buy a Nanopresso machine?
This little machine can be found on the Wacaco website for 70 dollars without the case and comes in many different colors. Something to highlight is that you have the option to buy some accessories to upgrade it a little bit; below, I recommend some of them. On Amazon, you can find it for 70 dollars.
Accessories for the Nanopresso maker
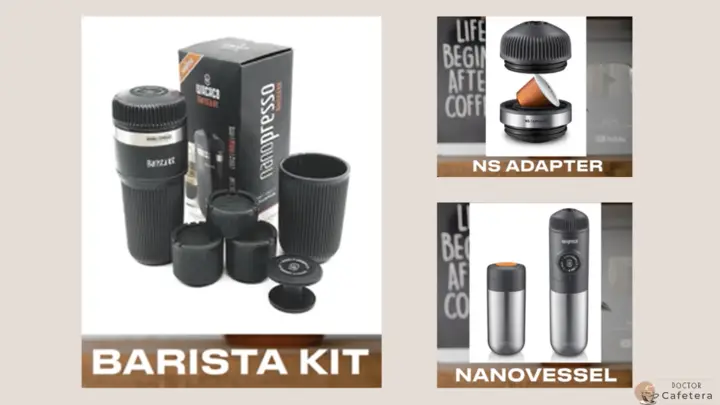
The main accessory I would recommend is the “barista kit“, which is like an adapter that we can put to place a larger basket with a capacity of 16 grams of coffee and a water tank with a capacity of 120 milliliters. This is ideal for preparing a larger amount of coffee; the disadvantage is that this machine increases almost twice its size.
The “NS Adapter” also allows the use of Nespresso capsules, which I find super convenient to take somewhere and make a quick coffee, obviously with rechargeable capsules and quality coffee.
And we also have the “Nanovessel”, which is a small thermos, which is great if you have nowhere to heat the water and is screwed directly into the Nanopresso to use it as a water reservoir.
Advantages and disadvantages of the Nanopresso machine
The main advantage of this little machine is quite obvious: it is very small. It takes up less space than a small bottle of water in a backpack, so it is ideal for a trip where we do not have much room or for everyday use.
Another big plus point is the price; for less than 100 dollars, we can get a decent espresso, which is a big plus.
The main point against this is the pressurized filter that avoids getting the more complex flavors of coffee and that texture and body we get with real espresso.
This can still be an advantage for those without experience or knowledge, as this filter allows you to use any grinder or not the best grind, and you will still get a decent espresso. The machine is more forgiving of the mistakes we can make, but it does not develop the coffee as much as we would like, and we can’t get it out either.
We don’t have the option of improving it with a non-pressurized filter or something like that, we can remove the little plug that restricts the outflow, but this does not produce the necessary pressure to extract the espresso.
Another point against is the capacity, 8 grams of coffee is very little, and drinking only about 25 grams of espresso takes a few seconds generally; if you take the coffee maker somewhere, it is because you want to enjoy a good coffee and take your time. That’s why the barista kit is an essential thing, in my opinion, if you want to buy this coffee maker.
It also happens that we cannot know how much pressure we are adding to the coffee. This machine claims to achieve up to 18 bars of pressure which does not interest us because for espresso, we only need between 6 and 9, so we do not know well what is happening inside to improve it.
And also, as I mentioned in the step-by-step, if you go out and do not have a spoon, placing the coffee in the small basket is very annoying and assures us that we will make a mess.
Do I recommend the Nanopresso maker?
I would recommend it to anyone looking for a portable espresso machine, prioritizing size. Also, for the price, it seems a good way to start in the espresso world.
For those who want to take it on a trip, I think it is a good option as long as you want espresso only occasionally. For a trip, I would take something to prepare filtered coffee or a good cup of coffee to enjoy quietly; since the small capacity of Nanopresso, we can not even prepare a cup of Americano or Long Black.
Comparison between the Nanopresso and the Flair Neo makers
We can compare this coffee maker with other portable espresso machines with pressurized filters, such as the Flair Neo, and with the barista kit of the Nanopresso to have the same coffee capacity.
With Neo, in my experience, we can get a better result. It also has the possibility of buying a non-pressurized filter and the pressure gauge, taking it to a much higher level. But when we disassemble it and take it with us, we have a much larger case that takes up more space.
The advantage of the Nanopreso will always be its size and portability, but I would not use it to prepare espresso at home.