Coffee cupping is a process through which the organoleptic characteristics of a coffee are analyzed and evaluated. It is carried out through a series of steps and specific techniques to determine the qualities of aroma, flavor, acidity, body, and aftertaste of the coffee, among others.
In this article, we will delve into the specifics of coffee cupping, a method commonly used by producers, roasters, and professional coffee tasters to assess the quality and consistency of coffee beans.
I will demonstrate the process of preparing a coffee cupping and conducting a sensory analysis of various coffee beans. While it is possible to do this with only one type of coffee, using two or three different types is recommended to expand your taste and train your palate.
What do you need for a coffee cupping?
- First of all, we will need a manual or electric coffee grinder. I always recommend a good quality one. If you use a very expensive coffee, it would be a big waste to ruin it with an uneven grind that won’t allow you to feel the true flavors.
- We also need to place the samples in glass beakers of the same size and known capacity. If we use a 7-ounce glass, we will add 12 grams of coffee per glass; the ratio is one gram for every 17 grams of water.
- Using a simple rule of thirds, you can determine the appropriate amount of coffee if your glass has a different capacity than the standard container. It is important to fill the capacity and ensure it goes all the way to the rim.
- Bring two extra glasses to the table to clean the spoons and some kitchen towel sheets to wipe up any leftovers.
- Additionally, we will need water for the coffee; I have an article you can see here where I tell you how the taste of the water affects the drink, so be sure to use a good quality one. The amount varies depending on the size of your cups. We will heat it to boiling.
- Finally, we need two cupping spoons, but if you don’t have them, you can use any dessert or soup spoon.
What you should do before starting the cupping
While the water is boiling, you can prepare and grind the coffees one by one. Take the first one, weigh the 12 grams and take it to the grinder.
Note: Before grinding each sample, we should pass some extra grains of the coffee that we will grind through the grinder to remove the remains of other coffee that may have been retained inside, and in this way, we do not contaminate flavors.
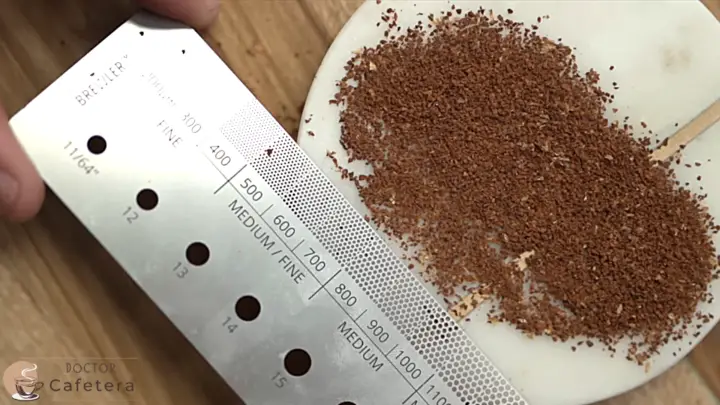
The grind size will be similar to what we use for a Hario V60. If you use a ruler for ground coffee, it is around 800 microns. Continue grinding the other two coffees, passing a few beans between each one. Once the three samples are ground, we will place them in front of us, a little bit apart.
I strongly advise conducting the cupping process blindfolded, without knowledge of which coffee belongs to which glass, to ensure objectivity and to be surprised by the results. To do this, place labels with the names of each coffee under the glasses and have someone mix them while you are blindfolded.
How to perform the coffee cupping?
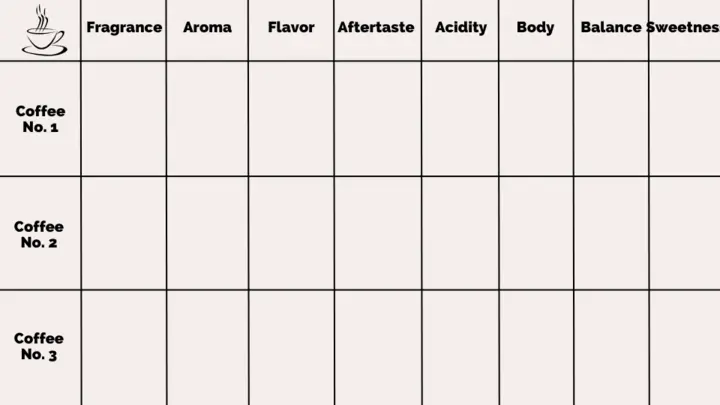
To make this much simpler, you are going to take a sheet of paper where you can write down the following attributes that should be taken into account:
- Fragrance
- Aroma
- Flavor
- Aftertaste
- Acidity
- Body
- Balance
- Sweetness
We will evaluate the quality and intensity of each factor, whether it is too much or too little. So feel free to add, if you want, a score for each attribute. For example, from 1 to 5, please, write it down also in words.
Next to the attributes, we are going to place sample 1, sample 2, and sample 3 so that we can write down everything for each coffee. This exercise of attributes remembers everything we feel in each aspect and thus compares it with the other samples.
Now we will look at each of these attributes in more detail.
Fragrance evaluation
The first thing we will do, before starting with the water, is to evaluate the fragrance, which is the smell of the coffee when the sample is dry. We bring the sample to our nose and smell the ground beans to determine and describe this fragrance.
We can tap the cup to move the coffee a little and thus feel the smell a little better. Then, what we should ask ourselves is if the fragrance we feel is soft or if it is very intense.
Note: Write down everything that comes to your mind, write it down no matter if it sounds strange to you, and do not think about it too much. We repeat this step with the other two coffees evaluating and writing down what we feel.
Aroma evaluation
Once the water boils, we will instantly use it if the coffees are lightly roasted since they need a high temperature. We will start the count on a timer and place the water in each cup.
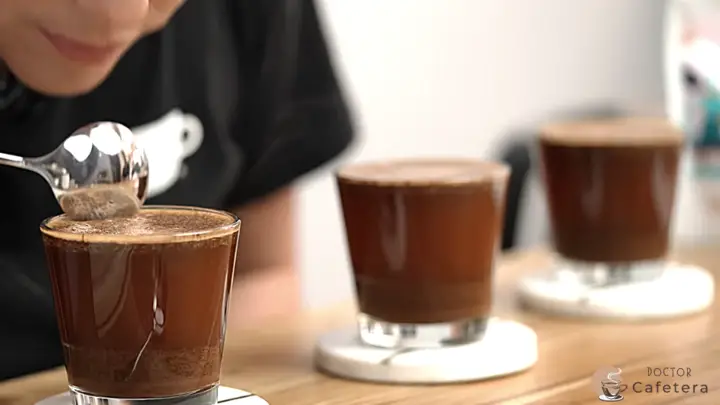
We pour quite fast at the beginning to create a little turbulence in the coffee so that no part of it is left without getting wet. But as it fills up, we go slower and careful not to overflow it, but we fill it well to the brim.
When we finish with the samples, we also fill the remaining glasses with water for the spoons, and we are going to leave them without interrupting, neither touching nor moving the table, until the time marks 4 minutes. In the meantime, we can smell the aromas that come out when we wet the coffee, and we will write them down at once.
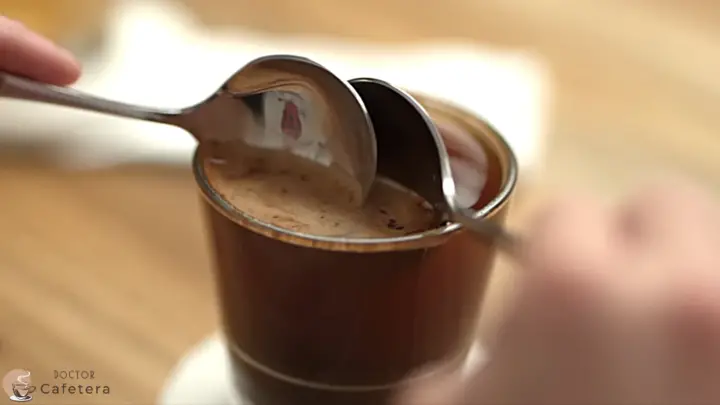
When the time reaches 4 minutes, we will break the crust to cut the extraction. For this, we are going to take one of the spoons, and we are going to create a diagonal line from our nose with the spoon facing the wall of the glass to the surface.
And with this position, we will move the spoon from the back to the front three times over the entire surface of the coffee. Then we turn the surface once, clean the spoon, dry it with the paper, and continue cleaning the other two in the middle.
The aroma, in the form of steam released when we break the crust, accompanies the spoon and travels directly to our nose. So it is time to smell and feel this “bomb”, where the fragrance we just felt will be, but well intensified, and if there is something new, we also note it.
Related: Basic starter kit for coffee preparation.
Flavor evaluation
Next, we have to clean the surface of the coffee of the residue and foam left to have better clarity. To do this, we take two spoons, place them horizontally, touching each other, and sweep with everything; lifting one spoon and placing the other underneath, we take the residue and discard it.
Then we clean the spoons in the glass again and continue with the other two glasses. Once finished, we take the used glass, wash the spoons, and keep another clean one for cupping.
In this instance, the coffee will still be too hot to feel anything, and we are going to burn ourselves, so we will wait for the clock that we placed before to mark about 8 to 10 minutes, which is when the coffee is already at approximately 70 degrees, to start tasting.
After this time, with the spoon, we are going to take a small portion of the surface, and we are going to take it to the mouth. We will aspirate so that the coffee occupies as much area of the mouth as possible, especially on the tongue and palate. With these high temperatures, the retronasal vapors are at their maximum intensity so that we will evaluate the flavor and aftertaste.
Aftertaste evaluation
The aftertaste indicates if the coffee leaves that flavor in the mouth or if, when we swallow, we no longer feel it if it is intense or light. We will taste the three coffees several times, contrasting with the others, without a specific order, until the temperature goes down. In the meantime, we write down everything we perceive.
Acidity evaluation
When the coffee continues to cool, we evaluate the acidity, the body, and the balance. Acidity is that sensation we perceive on the tongue that produces salivation, for example, when we bite a green apple. There are words we use to describe a positive acidity, such as the word “bright,” or we say it is “sour” when the acidity is negative.
To feel the notes, it is easiest to think of fruits. For example, some coffees have an acidity present but not super marked, which reminds us of the acidity of an orange, but like an orange candy or a sweetened orange peel, something sweeter than the fruit alone, and in that case, we could say that it is bright.
Body evaluation
By body, we mean the mouthfeel of the texture of the drink. For example, is it heavy and silky like cream or lighter like tea?
To give you an idea, some coffees are silky but without a heavy body or nonexistent, perhaps with a lighter, more delicate body.
Balance evaluation
Balance determines whether the coffee you are cupping has a balance between the other attributes mentioned so far or whether it is flat or contrasting. The question to ask at this point is whether one of these attributes stands out or overshadows any of the others or whether they all work perfectly together to create a unified flavor.
Sweetness evaluation
You must think about sweetness when the coffee is almost at room temperature. When we talk about sweetness in coffee, we are not referring to sweetness like when we put sugar in coffee; it is not that evident. When the temperature drops, it is easier to distinguish it.
For example, some coffees have a very pronounced sweetness, such as honey, caramel, molasses, and maple syrup, which are easier to recognize.
Final note
Finally, you can add a symbolic score to remember which of the coffees you have tasted you liked the most. Two or three coffees is the minimum I recommend for cupping and is a good number to start with without feeling overwhelmed.
Conclusion
The more coffees you can try, the better. 4, 5, and 6 coffees of different varieties are very useful for distinguishing the most contrasting flavors.
Remember that all the notes we add are based on our experiences as cuppers, on our olfactory and taste memories. This can vary greatly from country to country, as we have different cultures with different foods and beverages.
The ability to recognize coffee characteristics improves and becomes easier with each cupping, so I recommend doing it as often as possible. It is a very fun exercise that broadens our palate.